1. Overview
Sensory Boards is a web-based AAC (Augmentative and Alternative Communication) board builder that puts powerful communication tools in your browser. Design boards with over 2,000 built-in symbols, import and export using the open OBF/OBZ standard, run boards with the PiCom communicator for real-time speech output, and print or share your creations — all without installing any software.
2,000+ Symbols
A rich built-in symbol library with keyword and synonym search to quickly find the right image.
OBF / OBZ Support
Import and export boards in the Open Board Format standard for interoperability with other AAC tools.
PiCom Communicator
Run your boards in a full-screen communicator with text-to-speech, configurable input methods, and visual settings.
Print & Share
Print boards directly from the editor or share them via link for collaborative use.
Customisable Styling
Control colours, fonts, sizes, borders, and annotations on a per-cell or whole-board level.
Multiple Symbol Sources
Add symbols from the built-in library, web search, camera/upload, or AI generation.
2. Home Screen
The home screen is the starting point of Sensory Boards. It presents four action cards and a settings button.
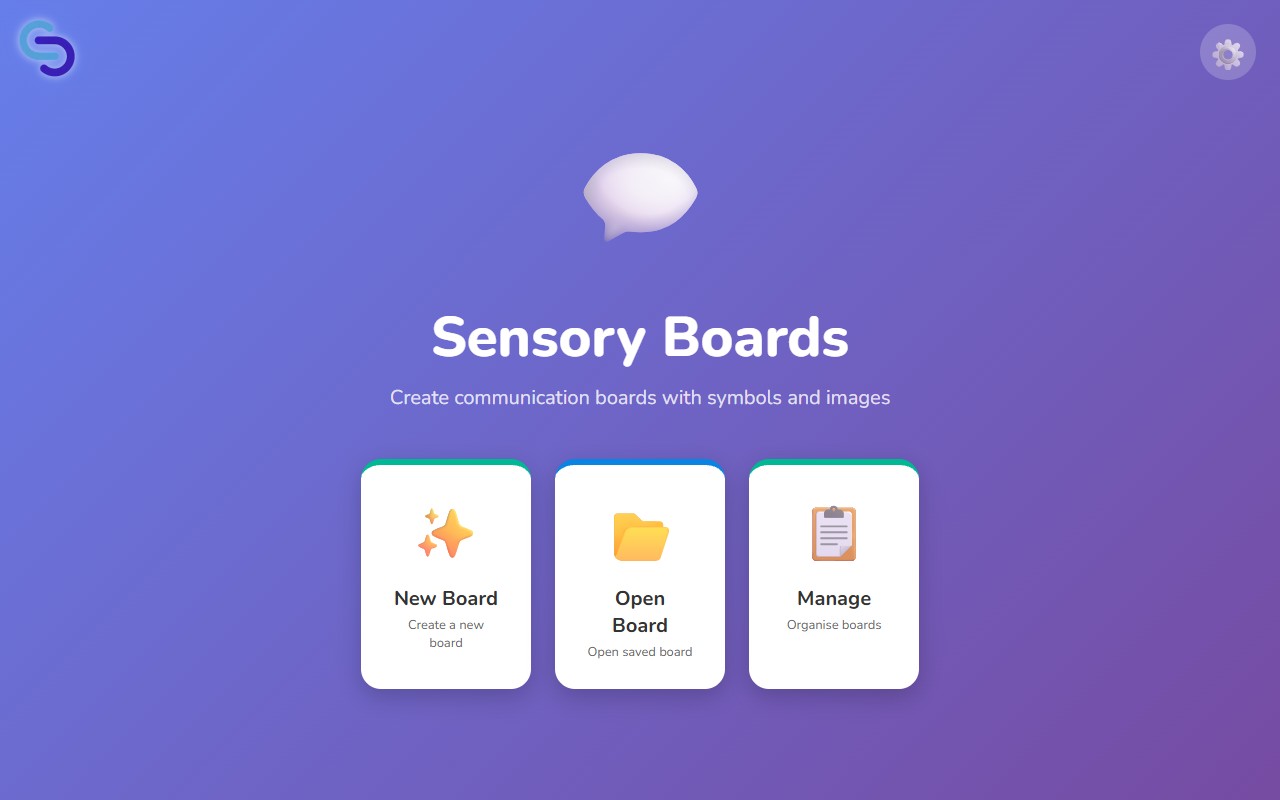
New Board
Create a brand-new communication board from scratch. You will be asked for a name and grid size.
Open Board
Browse and open boards you have previously created or imported.
Manage
Duplicate, rename, export, print, share, change the symbol set, or delete existing boards.
Run
Launch PiCom with its built-in board collection. This card only appears when the Communicator option is enabled in Settings.
3. Settings
The Settings panel lets you configure default values that apply to every new board you create, manage symbol libraries, and toggle advanced features.
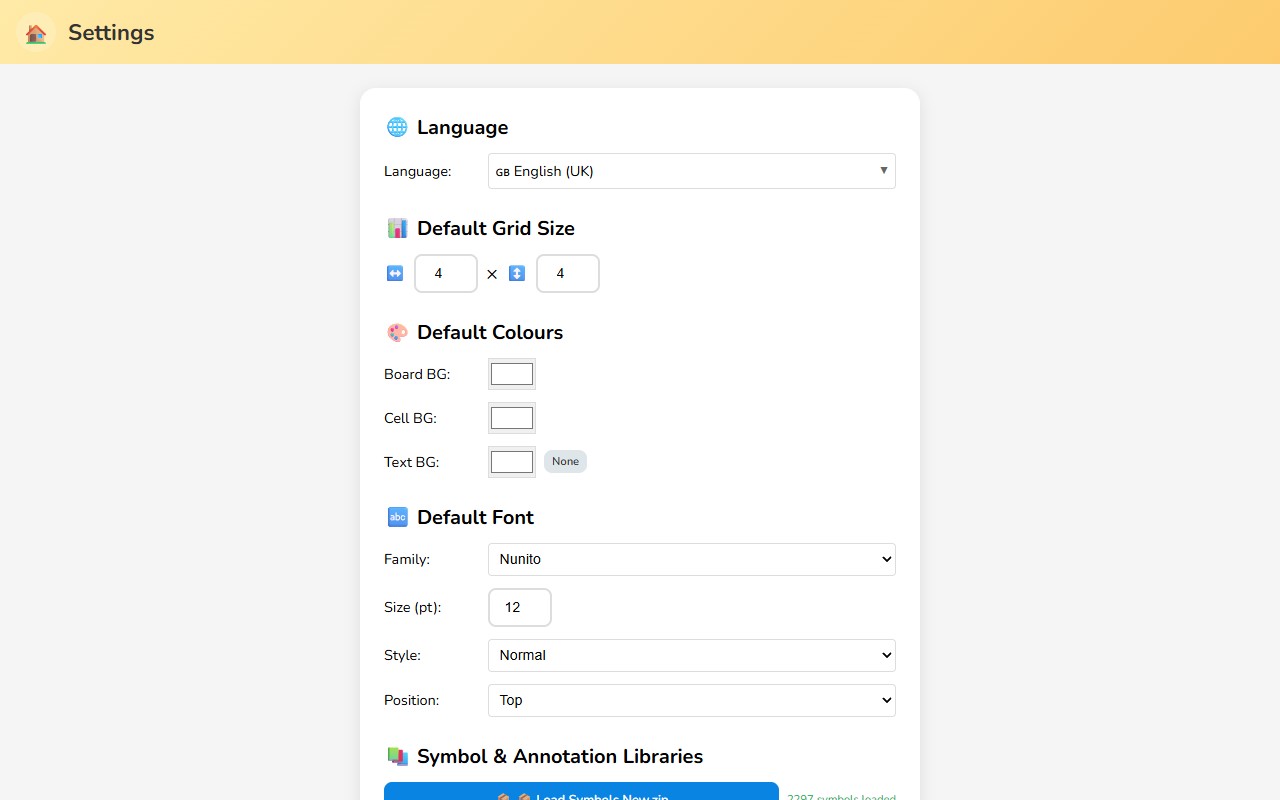
Language
Choose the interface and speech language. This affects text-to-speech output in PiCom and the symbol search language.
Default Grid Size
Set the default number of columns and rows for new boards. The default is 4 × 4. You can always change the size of individual boards later.
Default Colours
- Board Background — the colour behind the entire grid.
- Cell Background — the default fill colour for each cell.
- Text Background — the colour behind the label text within each cell.
Default Font
Configure the default font family, size, style (normal, bold, italic), and position (top or bottom of the cell) for labels.
Symbol & Annotation Libraries
Load custom symbol or annotation packs by selecting a .zip file. After loading, the settings panel shows the number of symbols or annotations available in the library.
Communicator
A checkbox that enables the Run card on the home screen and the Run Board buttons throughout the app. When disabled, the PiCom communicator features are hidden.
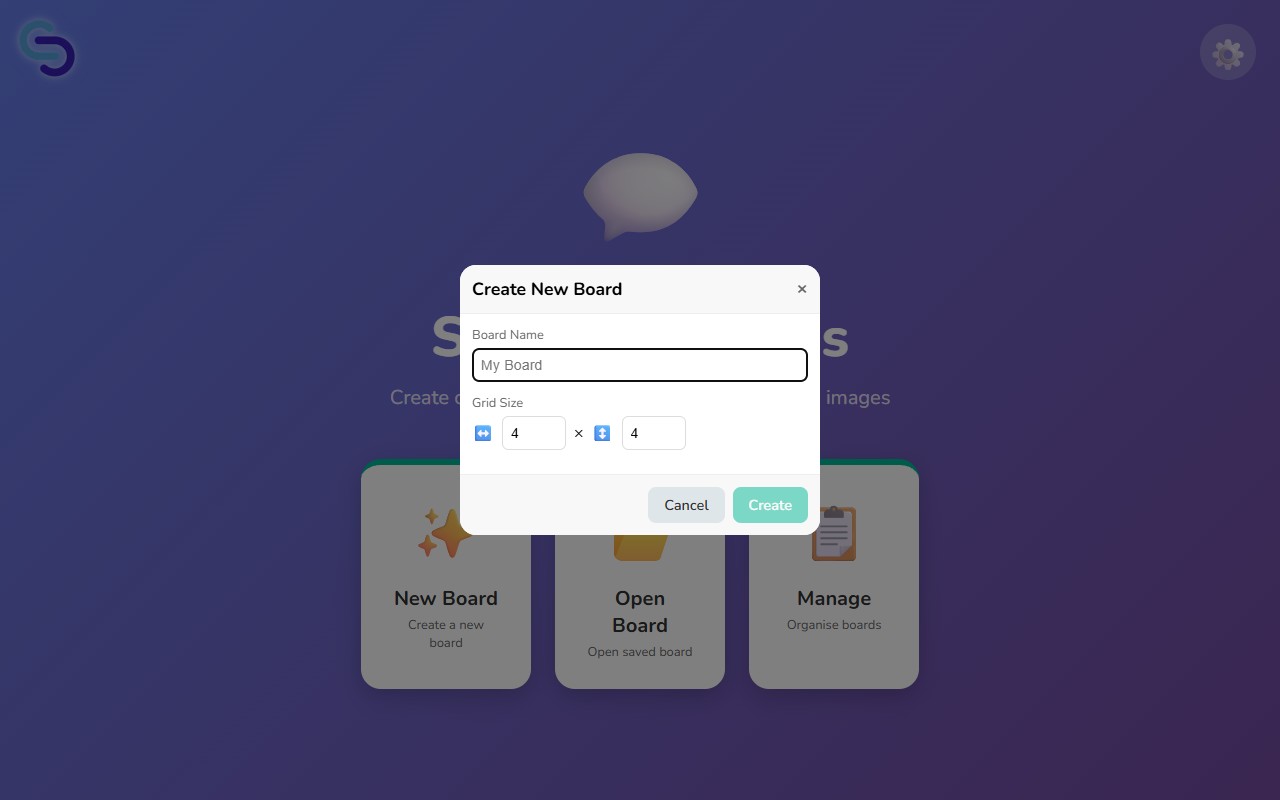
4. Creating a New Board
Follow these steps to create a new board from scratch.
- Click the New Board card on the home screen.
- Enter a name for your board. Board names must be unique — if the name is already taken you will be asked to choose another.
- Set the grid size by adjusting the number of columns and rows using the + and − buttons.
- Click Create to open the board in the editor.
5. Opening & Loading Boards
The Open Board screen displays all your saved boards as cards. Each card shows a thumbnail preview, the board name, and its grid dimensions.
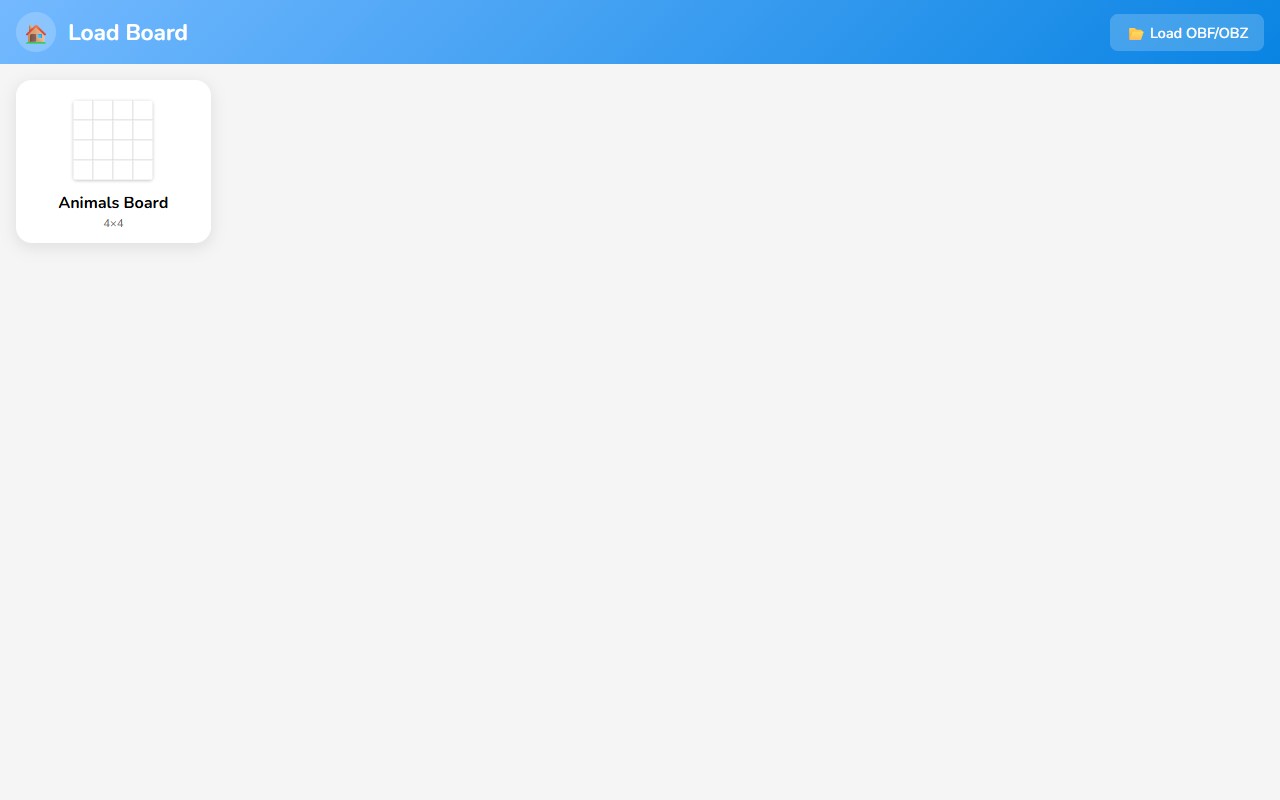
Each card has two action buttons:
- Edit Board — opens the board in the full editor.
- Run Board — builds the board and sends it to PiCom for communication use (visible only when Communicator is enabled).
In the top-right corner of this screen you will find the Load OBF/OBZ button for importing boards from files. See the Importing OBF/OBZ section for details.
6. Importing OBF / OBZ
Sensory Boards supports the Open Board Format standard for importing boards created in other AAC applications.
File Formats
- .obf — a single board in JSON format.
- .obz — a board set packaged as a ZIP archive, containing one or more
.obffiles along with their associated images.
How to Import
- Go to Open Board from the home screen.
- Click the Load OBF/OBZ button in the top-right corner.
- Select an
.obfor.obzfile from your device. - If the file contains images hosted at external URLs, a progress bar will appear while those images are downloaded and embedded.
- Once import is complete the board (or boards) will appear in your board list.

7. Board Editor
The Board Editor is where you design your communication board. It is divided into three areas.
Board Grid (Left)
The main editing canvas showing all cells arranged in a grid. Click any cell to select it — the selected cell is highlighted with a blue border.
Add Symbol Panel (Top-Right)
Search for and add symbols to the currently selected cell. Includes multiple source tabs for finding the right image.
Cell Editor Panel (Bottom-Right)
Edit the label, font, colours, border, and annotation of the currently selected cell.
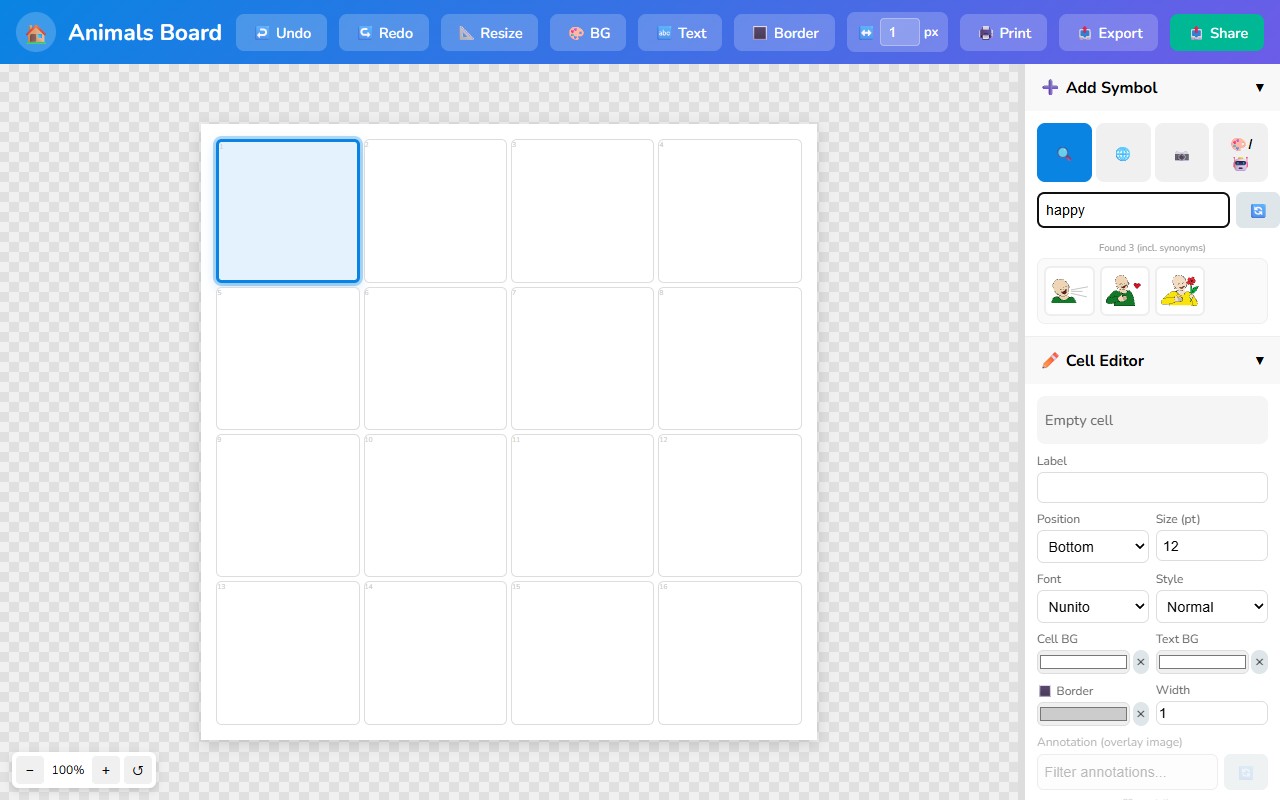
8. Adding Symbols
The Add Symbol panel in the top-right of the editor provides four ways to find and add images to a cell.

Searching
Type a keyword into the search bar. The search engine uses synonym matching, so searching for "happy" will also find symbols tagged with "glad", "pleased", and other related words.
Symbol Sources
Four tabs provide different sources for symbols:
Symbol Library
Browse over 2,000 built-in symbols. This is the default tab and the fastest way to add standard AAC symbols.
Web Search
Search the web for images. Useful when you need a specific photo or illustration not in the built-in library.
Camera / Upload
Take a photo with your device camera or upload an image file from your computer.
AI Generate
Generate a custom symbol using AI. Describe what you need and a symbol will be created for you.
Adding a Symbol to a Cell
- Select a cell in the board grid by clicking on it.
- In the Add Symbol panel, search for a keyword or browse a source tab.
- Click on a symbol thumbnail to add it to the selected cell.
9. Cell Editor
The Cell Editor panel in the bottom-right lets you fine-tune every aspect of the selected cell.

| Option | Description |
|---|---|
| Symbol Preview | A preview of the image currently assigned to the cell. |
| Label | Editable text displayed on the cell. This is also the text spoken by PiCom. |
| Position | Place the label at the Top or Bottom of the cell. |
| Size (pt) | Font size of the label in points. |
| Font | Font family for the label text. |
| Style | Font style: normal, bold, italic, or bold italic. |
| Cell BG | Background colour of the cell. Use the colour picker to choose any colour. |
| Text BG | Background colour behind the label text. |
| Border Colour | Colour of the cell border. |
| Border Width | Thickness of the cell border in pixels. |
| Annotation | An overlay image on top of the cell, drawn from the annotation library. Useful for marking word categories or adding visual cues. |
10. Editor Toolbar
The blue toolbar across the top of the editor provides quick access to common actions.
| Button | Action |
|---|---|
| Home | Return to the home screen. Your board is auto-saved. |
| Undo | Undo the last change. |
| Redo | Redo a previously undone change. |
| Resize | Change the grid dimensions (columns and rows) of the current board. |
| BG | Change the background colour of all cells at once. |
| Text | Change the text colour or text background colour across all cells. |
| Border | Change the border colour for all cells. |
| Border Width (px) | Set the border width in pixels for all cells. |
| Open the browser print dialog to print the board. | |
| Export | Export the board as an OBF or OBZ file. |
| Share | Generate a shareable link for the board. |
11. Exporting
Export your boards in the Open Board Format so they can be backed up, shared, or used in other AAC applications.
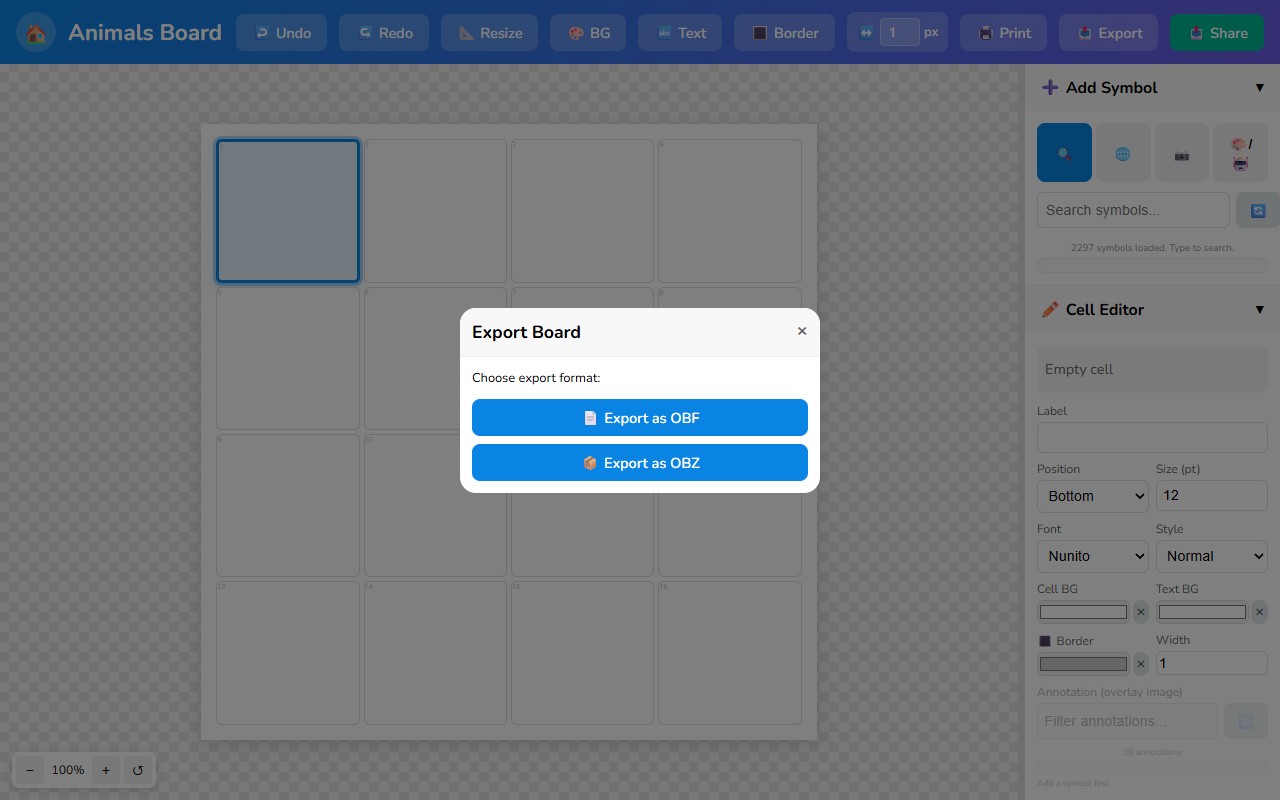
Export Options
Export as OBF
Exports the board as a single .obf JSON file. Images are embedded as Base64 data URIs within the file. Best for sharing a single board.
Export as OBZ
Exports the board (or board set) as a .obz ZIP archive containing OBF files and image assets. Best for board sets or when file size matters.
- Click the Export button in the editor toolbar (or from the Manage screen).
- Choose Export as OBF or Export as OBZ.
- A progress bar will appear while images are prepared and packaged.
- The file will download automatically when ready.
12. Managing Boards
The Manage screen provides a complete set of tools for organising your board collection.
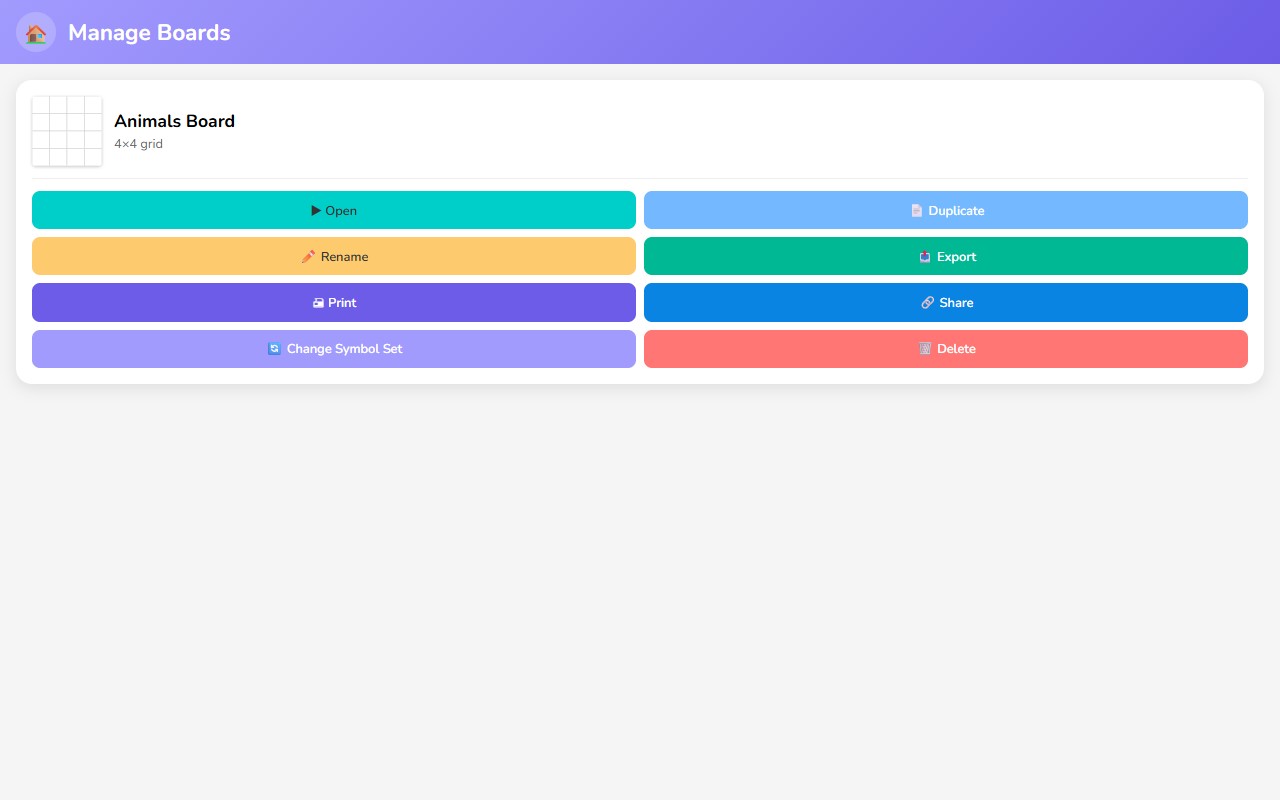
Each board card offers the following actions:
| Action | Description |
|---|---|
| Open | Open the board in the editor. |
| Duplicate | Create a copy of the board with a new name. |
| Rename | Change the board's name. Names must remain unique. |
| Export | Export the board as OBF or OBZ. |
| Send the board to the printer. | |
| Share | Generate a shareable link. |
| Change Symbol Set | Replace the symbol set used in the board with a different library. |
| Delete | Permanently remove the board. This action cannot be undone. |
13. Running in PiCom
PiCom is the built-in communicator that turns your boards into an interactive, speech-enabled communication tool.
Enable the Communicator
Before you can run boards, you must enable the Communicator feature in Settings by checking the Communicator checkbox. This reveals the Run card on the home screen and Run Board buttons throughout the app.
Two Ways to Run
Run Board (from Open Board)
Click Run Board on any board card in the Open Board screen. Sensory Boards builds the board and sends it to PiCom via IndexedDB, then opens PiCom in a new tab.
Run Card (from Home)
Click the Run card on the home screen to launch PiCom with its own built-in board collection.
PiCom Start Screen Settings
| Setting | Description |
|---|---|
| Input Method | Choose how the user interacts with the board (e.g., touch, switch scanning). |
| Visual | Configure display options such as high contrast and cell sizing. |
| Speech | Select the text-to-speech voice, speed, and pitch. |
| Advanced | Additional configuration options for specialised setups. |
Using PiCom
- Configure your settings on the start screen.
- Tap the green arrow button to start the communicator.
- Tap any symbol on the board to hear it spoken aloud.
14. Board Sets
Board sets are collections of linked boards packaged together in an OBZ file. They allow multi-page communication layouts where tapping a cell can navigate to a different board.
How Board Sets Work
- An OBZ file can contain multiple boards, each with its own grid and symbols.
- Cells can be configured as linked cells that navigate to another board in the set when tapped.
- This enables multi-page layouts — for example, a home board with category cells that each open a topic-specific board.
- Board-to-board navigation works seamlessly in PiCom.
15. Tips & Shortcuts
General Tips
- Auto-save — Your boards are saved automatically as you edit. No need to manually save.
- Undo / Redo — Use the toolbar buttons to step backward and forward through your changes.
- Synonym search — The symbol search understands synonyms. Try different words if your first search doesn't find what you need.
- Export for backup — Regularly export your boards as OBZ files. Browser storage can be cleared unexpectedly, so backups are important.
Board Design Best Practices
- Colour coding — Use consistent cell background colours to group words by category (e.g., green for verbs, yellow for nouns, pink for descriptors). This helps users find words faster.
- Core vocabulary placement — Place the most frequently used words in prominent, easy-to-reach positions on the board. Core words like "I", "want", "go", "help", and "more" should be immediately accessible.
- Consistent layout — Keep navigation and frequently used cells in the same position across boards so users can build muscle memory.
- Appropriate grid size — Start with fewer cells for beginners and increase complexity as the user becomes comfortable.
Troubleshooting
| Problem | Solution |
|---|---|
| Run Board button is missing | Open Settings and enable the Communicator checkbox. |
| PiCom opens but the board is empty | Make sure you clicked Run Board from the Open Board screen (not the Run card on the home screen, which uses PiCom's built-in boards). |
| Imported OBZ images are missing | The images may have been hosted at external URLs that are no longer available. Check your internet connection and try re-importing the file. |
| Board name already exists | Board names must be unique. Choose a different name or rename the existing board first. |
| No speech output in PiCom | Check that your device volume is turned up and that a text-to-speech voice is available for the selected language in your browser or OS settings. |
| PiCom blocked as a pop-up | Allow pop-ups for the Sensory Boards site in your browser settings. PiCom opens in a new tab. |
| Symbol search returns no results | Try a different keyword or synonym. Check that a symbol library is loaded in Settings. |
| Board not appearing after import | Ensure the file is a valid .obf or .obz file. Try refreshing the page and checking the Open Board screen. |